Mastering the First Layer in 3D Printing
- Slant 3D
- Jan 23, 2024
- 2 min read
Want to master the first layer on your 3D printed product? Checkout the steps we take to ensure a strong desirable first layer for your 3D printed product.
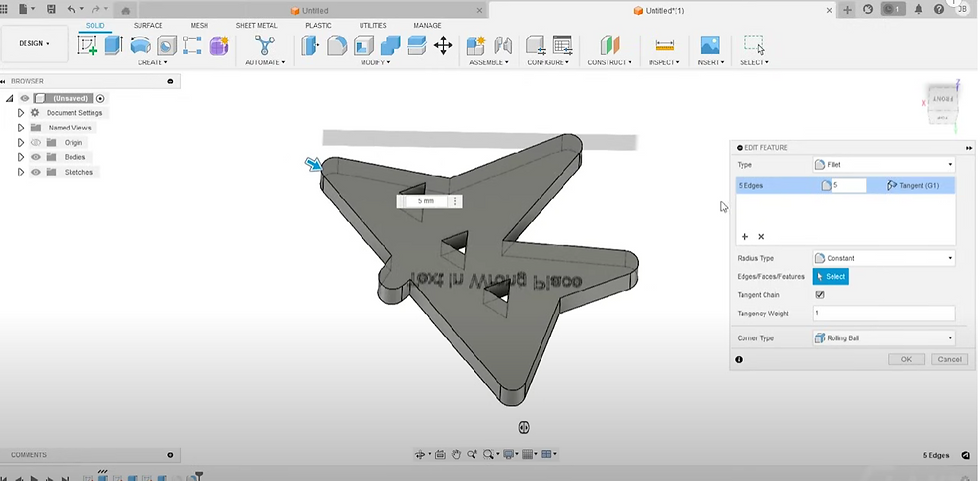
The downside of Triangular Holes: The worst first layer ever created – featuring those triangular holes. Not only are they sharp and prone to deformation, but they're also unnecessary in this context. The solution? Embed cosmetic features instead of letting them disrupt the first layer. This creates a smoother surface, eliminating the risk of deformation and warping while maintaining the desired appearance while in mass production for 3D printing.

Texts and Where to Place Them: Ever considered putting text on the bottom of an FDM part? It's a bad idea. The first layer might squash and deform it, leading to unreliable prints.
What to do with Sharp Corners: Sharp corners can be a headache during the first layer, causing drag, deformation, and potential failures. Want to fix it? Round out those corners to the maximum extent possible. Go for substantial fillets – whether 1 mm or larger – to create a smoother transition, minimizing abrupt stops and accelerations.

The Power of a Circular Base: Witness the transformation of a star-shaped nightmare into a circular dream. The rounder, smoother, and more circular the first layer, the better. However, beware of large, flat surfaces that might introduce unwanted artifacts. Minimize them, cut out a cone, and reduce contact to maintain stability while ensuring effortless part ejection down the line.

Striving for Simplicity: In the quest for the perfect first layer, simplicity is your ally. Minimize the extraneous features, round it out, and eliminate unnecessary complexities. Whether you're dealing with holes or surface defects, push them away from the first layer to enhance machine control and ensure a flawless starting point.
Comments